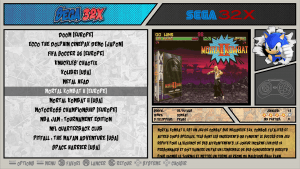
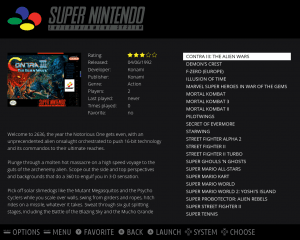
This tutorial is to show you how to install recalbox 4.0.2 in a Raspberry Pi 3 and make a true retro gaming machine.
UPDATE: Recalbox 4.1 released – https://github.com/recalbox/recalbox-os/releases
Table of Contents
- RetroPi vs Recalbox
- Hardware
- Software
- RecalBox Tutorial
- Controller Configuration
- Wireless Connection Setup
- Recalbox Upgrade
- Root Access to Recalbox using SSH
- Installing Themes
- Adding ROMs in Recalbox
- Scraping Artwork and Game Information
- Backup your Recalbox
- Troubleshooting
First of all what’s better RetroPi or Recalbox?
RetroPi vs Recalbox
Personally for me it all depends on choice and preference. Both are good in their own ways. Both run Retroarch and Emulationstation. So not much of a difference. But there are some features that only RetroPi has and some that only Recalbox has.
| RECALBOX | RetroPie |
|
|
Now, Let’s talk about the things you need:
Go through the compatibility list first. Very very important!!! : CLICK HERE
Hardware
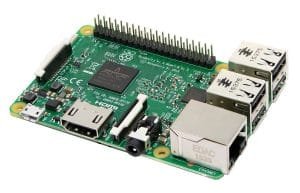
Raspberry Pi 3
I am sure you can install this in any other Raspberry Pis but I prefer Pi3 because of its power and support. You can buy it easily from Amazon : Click Here
- Raspberry PI 3 Model B A1.2GHz 64-bit quad-core ARMv8 CPU, 1GB RAM : Click Here
- Raspberry Pi 2 Model B Desktop (Quad Core CPU 900 MHz, 1 GB RAM, Linux) : Click Here
- Raspberry Pi Model B+ (B PLUS) 512MB Computer Board : Click Here
- Raspberry Pi Zero v1.3 Development Board – Camera Ready : Click Here
- Raspberry Pi Zero W (Wireless) (new 2017 model) : Click Here
Raspberry Pi 3 Case
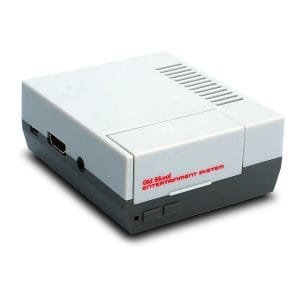
Your pi case makes this build even more interesting! Therefore, I decided to get the NES Case by Old Skool from Amazon : Click Here
- NES case for Raspberry Pi 3,2 and B+ by Old Skool Tools : Click Here
- Super Tinytendo Case for Raspberry Pi 3, 2, Model B with Large Cooling Fan : Click Here
HeatSink
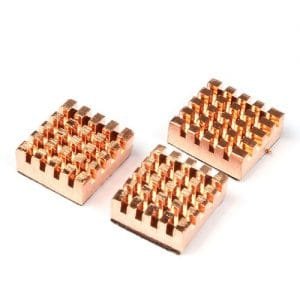
We will need some copper heatsink cooler for this setup. The case comes with airflow grill but doesn’t have a fan support.
- SainSmart Copper Heatsink Heat Sink Cooler Set for Raspberry Pi RPI : Click Here
Micro SD Card or USB drive
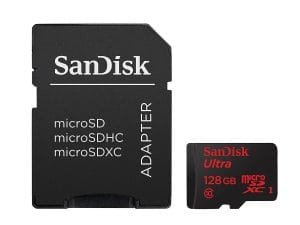
Your Micro SD Card or USB drive must be at least 8GB in size. Recalbox recommends Sandisk Ultra series cards or drives. I got the Sandisk 128GB Ultra Series Micro SDXC Card.
One important thing to remember is that it is recommended to use USB drive or stick instead of Micro SD Card because SD cards seem to get corrupted over time. But as long as you make a backup, it shouldn’t be a big deal. I suggest you get one of the following:
- Sandisk Ultra 128GB microSDXC UHS-I Card with Adapter : Click Here
- SanDisk Ultra 64GB microSDXC UHS-I Card with Adapter : Click Here
- SanDisk Ultra 32GB microSDHC UHS-I Card with Adapter : Click Here
- SanDisk Ultra 128GB Dual Drive m3.0 for Android Devices and Computers : Click Here
- SanDisk Ultra 64GB Dual Drive m3.0 for Android Devices and Computers : Click Here
- SanDisk Ultra 32GB Dual Drive m3.0 for Android Devices and Computers : Click Here
- SanDisk Ultra 16GB Dual Drive m3.0 for Android Devices and Computers : Click Here
Micro SD Card Reader
This one will be handy if you decide to go the MicroSD route. Honestly, for the case above, Micro SD looks so much better than USB drive as we won’t have to plug anything in the front.
![[2-in-1] WEme Type-C (USB 3.1 Gen 1)Card Reader with USB-C Male & USB 3.0 Male Connecter, Support Micro SD/ TF/ SDHC/ SDXC for New MacBook, Google Chromebook Pixel, Surface Pro & SmartPhones](http://www.dumbsum.com/wp-content/uploads/2017/07/61AJ1i1XAwL._SL1000_-300x300.jpg)
[2-in-1] WEme Type-C (USB 3.1 Gen 1)Card Reader with USB-C Male & USB 3.0 Male Connecter, Support Micro SD/ TF/ SDHC/ SDXC for New MacBook, Google Chromebook Pixel, Surface Pro & SmartPhones
- [2-in-1] WEme Type-C (USB 3.1 Gen 1)Card Reader with USB-C Male & USB 3.0 Male Connecter, Support Micro SD/ TF/ SDHC/ SDXC for New MacBook, Google Chromebook Pixel, Surface Pro & SmartPhones : Click Here
HDMI Cable
This might come with your raspberry pi. If you need one, my suggestion is you get HDMI 2.0 with gold plated one (for good conductivity) and preferably grey or white (to match with the pi case!) I recommend the following:

FLAT HDMI Cable – 6 FT (2-Pack) High Speed HDMI Cable (1.8m) Flat Wire – CL3 Rated, Supports, 4K, Ultra HD, 3D, 2160p, 1080p, Ethernet and Audio Return (Latest HDMI 2.0b Standard) White
- FLAT HDMI Cable – 6 FT (2-Pack) High Speed HDMI Cable (1.8m) Flat Wire – CL3 Rated, Supports, 4K, Ultra HD, 3D, 2160p, 1080p, Ethernet and Audio Return (Latest HDMI 2.0b Standard) White – 6 FEET : Click Here
Power Cable
Make sure you get white one as it will match your case 🙂 I recommend one of the following:
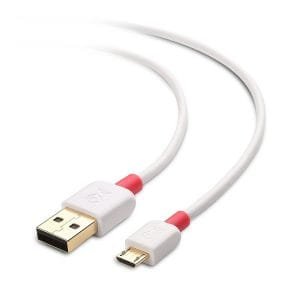
- Cable Matters 2-Pack, Gold Plated Hi-Speed USB 2.0 Type A to Micro-B Cable in White 6 Feet : Click Here
- UGREEN Micro USB Cable Nylon Braided Fast Quick Charger Cable USB to Micro USB 2.0 Android Charging Cord for Samsung Galaxy S7/S6/S5/Edge, Note 5/4/3, LG, Nexus, HTC, Nokia, PS4 (3ft, White) : Click Here
Power Adapter
It is recommended to use a dedicated Power Adapter instead of using your TV’s inbuilt USB port.

AUKEY USB Wall Charger, ULTRA COMPACT Dual Port 2.4A Output & Foldable Plug for iPhone iPad Samsung & Others – White
- Quick Charge 3.0 AUKEY 6-Port USB Charger for Samsung Galaxy S8/S7/Edge, iPhone 7/7 Plus, iPad Pro/Air 2, LG G5 and More : Click Here
- AUKEY USB Wall Charger, ULTRA COMPACT Dual Port 2.4A Output & Foldable Plug for iPhone iPad Samsung & Others – White : Click Here
- ORICO USB Wall Charger 18W USB Charger for Power Bank, Android and iPhone devices-White : Click Here
Extras
USB Switch – Adds simplicity to your setup. Make sure you get the usb one and NOT the micro usb one as all the switches that I’ve found is black in color. We don’t want to have a black wire running from the pi to the power outlet.
- JBtek® Raspberry Pi & Arduino Male to Female USB Cable with ON / OFF Switch – Easy Start / Reboot ! : Click Here
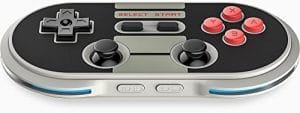
Bluetooth / Wired Controller – I prefer 8bitdo NES30 Pro Bluetooth Controller as it looks classic with our pi setup. But, you can also use Playstation 4 controller if you have one at home. If you decide to go with PS4 controller then we might have to tweak the code a bit.
- 8bitdo NES30 Pro Bluetooth Controller with Dynamic Labs Bonus Carrying Case : Click Here
- 8bitdo FC30 Pro Controller with Bonus Carrying Case : Click Here
- 8bitdo SNES30 Wireless Bluetooth Controller Dual Classic Joystick for IOS / Android Gamepad – PC Mac Linux : Click Here
- NES30 Game Controller – PC Mac Linux : Click Here
- DualShock 4 Wireless Controller for PlayStation 4 – Silver : Click Here
- Xbox Wireless Controller – White : Click Here
- PlayStation 3 Dualshock 3 Wireless Controller (Classic White) : Click Here
Software
7Zip or any other archiving software : http://www.7-zip.org/download.html
GUI Fat32 formatter : http://www.ridgecrop.demon.co.uk/index.htm?guiformat.htm
Recalbox OS : https://github.com/recalbox/recalbox-os/releases
Recalbox Themes : https://github.com/recalbox/recalbox-themes
Putty : https://www.chiark.greenend.org.uk/~sgtatham/putty/latest.html
Win32 Disk Imager : http://sourceforge.net/projects/win32diskimager/
Here is the link to the file that contains all the above files. : Click Here
RecalBox Tutorial
First, just go ahead and put everything in place in terms of setup.
Things to do in PC
1. Unzip and/or install 7Zip, Putty, Win32 Disk Imager and GUI Fat32 Formatter.
2. Take your Micro SD card (or USB Drive) and insert into your PC.
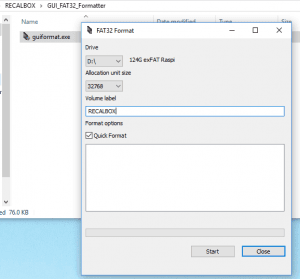
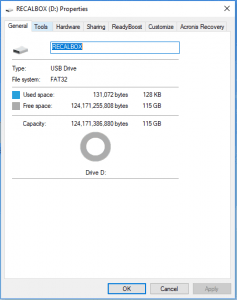
3. Open GUI Fat32 formatter and format your MicroSD Card (or USB Drive). Make sure it formatted into FAT32 filesystem. You can check this by going into drive properties.
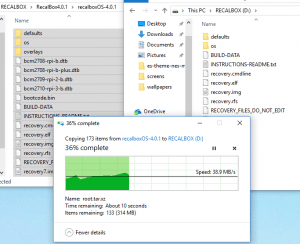
4. Unzip Recalbox 4.0.1 OS and copy it over to root of your MicroSD (or USB Drive).
5. Safely eject the Micro SD Card or USB Drive from your PC.
Things to do in Raspberry PI 3
1. Insert your Micro SD Card into Raspberry PI 3 and connect your HDMI to TV and Micro USB Cable to your power outlet. It is recommended that you use dedicated adapter instead of TV’s inbuilt USB port for power supply into your Raspberry PI.
2. Your Pi should boot into Recalbox Setup and install the OS automatically! As easy as 1-2-3!
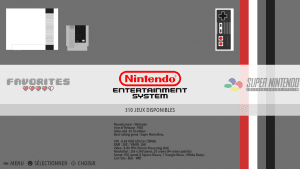
3. After everything is done, you will enter the Emulationstation Screen where you will have some default ROMs that you can test it out. You are ready for some retro-awesomeness!!
Now onto how to configuring your Bluetooth or Wired Controller
Controller Configuration
For the initial setup I suggest you have a keyboard with you as we will need it to configure wifi and other settings. Also I highly recommend you use a Wired USB controller for initial setup. You can use USB cable if you have 8bitdo wireless controller.
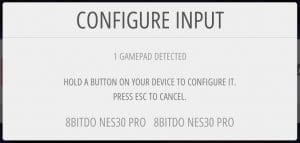
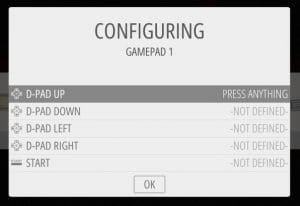
Go ahead and connect your wired USB Controller (8bitdo, PS4 or XBox controller will work just fine). Once detected you will see an on-screen popup that will ask you to press and hold a key on your controller.
Then just go through your controller key mapping setup process. That’s it! You can now play all the retro games.
Bluetooth Controller Setup
To add a bluetooth controller, set your controller in pairing mode.
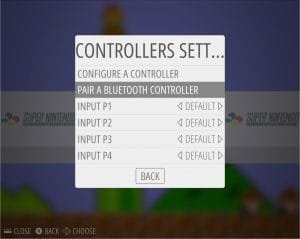
Go to the menu with wired controller or a keyboard and select Controller Settings.
A list of detected controllers will appear. Select your controller from the list pair it. That’s it! You can configure it if it’s not already a supported controller!
Note: When mapping keys, the HOTKEY is a button that will activate buttons combination. For example, to get out of a game into the Emulationstation main menu screen you must press HOTKEY and START button at the same time.
For more info on supported controllers click here.
Wireless Connection Setup
You will need a keyboard for this setup.
Press Start (or go to EmulationStation’s Main Menu).
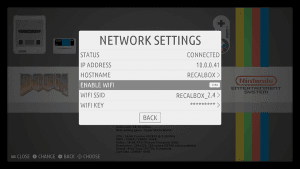
Then, go to Network Settings
Make sure the Enable Wifi is set to ON
Type in your network SSID and Password and hit the back button
If your recalbox doesn’t automatically connect to wifi just go ahead and restart. Make sure you use 2.4GHz connection as the RPi3 does not support 5GHz connection.
Once connected, it should show the status as connected in Network Settings.
Recalbox Upgrade
The latest stable verison of Recalbox OS release that you can download, as of today, is 4.0.1 but 4.0.2 update is already out. So, the first thing I would recommend you to do after wifi and controller setup is the OS update.
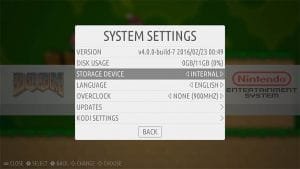
Go to the main menu and to the System Settings
In System Settings go to Updates
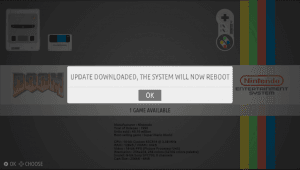
And, make sure the Auto Updates feature is set to on. Go to Start Update and follow on screen instructions. It will ask you for a system reboot. Go ahead and hit OK.
This might take couple of minutes and should update to 4.0.2.
Root Access to Recalbox using SSH
The default username and password for Recalbox is
Username: root
Password: recalboxroot
Make sure you have putty installed in your computer (look into the zip file you downloaded).
Goto Network Settings in your Recalbox.
Look for the IP Addresss. It should say something like 192.168.1.121.
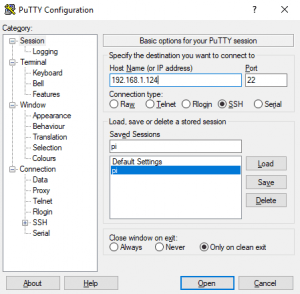
In putty, under hostname type in this ip address. Make sure the port number is set to 22. Click the Open button.
You should see a terminal screen that asks for username and password. Type the username and password as above.
If it asks to add your login to known hosts file. Type ‘yes’ and hit enter.
You now have the root access!
Installing Themes
In order to install themes, make sure you have the Recalbox Theme folder ready from above.
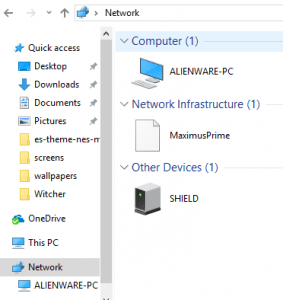
Open your Network from your PC. If you can’t see Recalbox in there then you will have to go through the FTP route as in my case. I couldn’t see the share folder in there so had to use FTP Client like FileZilla.
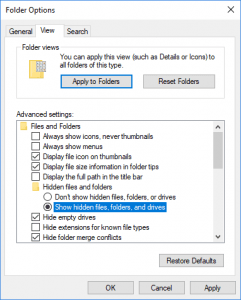
Before you do that, make sure you can see all hidden files. Just go to folder options and make sure Show hidden files, folders, and drives is turned on.
Open your favorite FTP client like FileZilla and use the same credentials as above to FTP into Recalbox using SSH.
Navigate to \\recalbox\share\system\.emulationstation\themes on your network
Copy the themes you want to use on your recalbox from recalbox-themes-master/themes/ (zip file above)
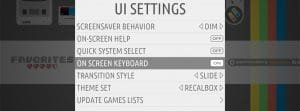
And Select the theme from the UI Settings in Main Menu in Recalbox and restart your pi. That’s it!
Adding ROMs in Recalbox
Just like installing themes, go to \\recalbox\share\
You will see a folder named ROMs and inside it you will see all the supported systems.
Just copy your game ROMs to the respective folders.
Scraping Artwork and Game Information
On your Recalbox Main Menu go to Scraper
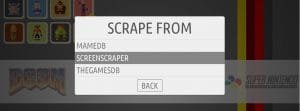
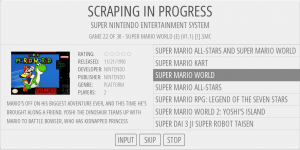
On scraper window select the scraper source(from). And start scraping! This will add beautiful artwork and game images into each games you have.
If it gives you multiple option to choose from for a game artwork, select the one that best fits the name and press A key (or any other key that selects the option).
Backup your Recalbox
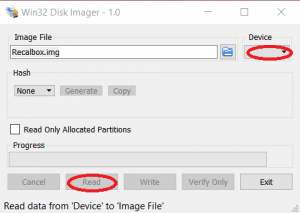
This is just a precautionary step. Once you setup everything you might want to make a backup copy of a working OS. Just go ahead and use Win32DiskImager to create an .img backup of your SD Card / USB device.
Connect your USB/SD Card to your PC and Open Win32DiskImager
Give your backup a name in the Image File section and select your device from the drop down list
Click on the Read button and this should create a backup file in your PC.
Troubleshooting
Audio Issues When using PS4 Controller
The PS4 controllers have an integrated audio module that prevents the broadcast of sound on your tv, or speaker. You need to blacklist audio module.
Connect in ssh via putty (follow directions above)
Mount partition :
mount -o remount,rw /
Edit this file:
nano /etc/modprobe.d/blacklist.conf
Add this line:
blacklist snd-usb-audio
Save (Ctrl+X and Y) & reboot
reboot
